 Happy Monday everyone, I hope that you all had a truly glorious weekend - mine was filled with baking classes, catching up with friends over delicious lunches and relaxing with my hubby, bliss! I’m so excited to show off the ombre petal cake that I made for Sienna’s First Birthday a couple of weeks ago - this technique has been around for ages, I even found a tutorial for it printed in the 50’s, so it’s nothing new but it’s ridiculously pretty and very easy to make! I hope that you enjoy the petal cake as much as I do, it’s certainly one of my new favourite icing techniques, I can’t wait to release the dates for the petal classes! Have a lovely day everyone, you deserve it. x
Click read more for the recipe.
Ombre Petal Layer Cake
2 x quantities of Vanilla Cake - see below
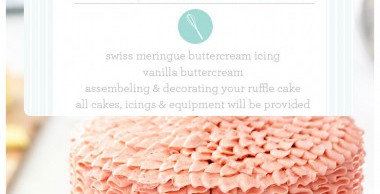
2 x quantities of Vanilla Buttercream Icing, for the layers between the cakes - see below
1 x Swiss Meringue Buttercream, for the ruffle - see below
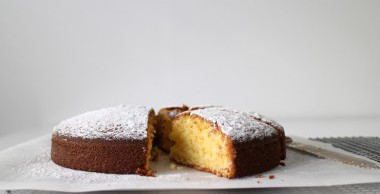
Vanilla Cake
2 1/2 cups (365g) plain flour, sifted
1 1/2 teaspoons baking powder
1 3/4 cups (385g) caster sugar
250g butter, melted
4 eggs
1 1/2 cups (375ml) milk
1 tablespoon vanilla
wilton peach food coloring
Preheat oven to 160°C. Line the base of a 20cm round cake tin and butter and flour the sides. In a large bowl sift the flour, baking powder and sugar, whisk to combine then make a well. Gently melt the butter in a small saucepan or in the microwave, make sure it doesn’t separate (you don’t want the oil to rise) Measure out the milk and add the vanilla to the milk and then pour into the flour mixture. Add the eggs one by one and then the butter and mix until combined - this is a runny pourable cake mixture. Pour your cake mixture into your prepared tin and bake for 30-35min or until a skewer inserted comes out clean. Allow to cool in the tin for 10min before turning onto a wire rack to cool completely.
For the petal cake, double your vanilla cake mixture and then divide the cake mixture evenly between three bowls - 770g of cake mixture per bowl. Gradually add small amounts of food colouring to each bowl until you have four mixtures ranging in colour from light to dark to your desired colour. Pour each cake mixture into the prepared cake tin and follow the instructions below. I only used three layers for this cake - you can make cupcakes with the extra mixture.
If you are like me and only have one cake tin (not four of the same size) make sure you throughly clean the cake tin after each use and run it under cold water to cool it down between uses - you will also have to prepare the cake tin each time for each cake.
Vanilla Buttercream Icing
115g butter, softened
60ml milk
3 teaspoons vanilla essence
500g icing sugar
Beat together the butter, milk, vanilla essence and half of the icing sugar until combined. Gradually add in the remaining icing and beat for around 10 minutes until smooth and creamy - the longer you mix it the whiter and smoother it will get.
Swiss Meringue Buttercream
5 large egg whites (30g each–total 150g)
1 cup plus 2 tablespoons superfine granulated sugar
500g butter, cut into cubes to soften
1 tablespoon vanilla essence
Peach food coloring gel
Wipe the bowl and beater of an electric mixer with paper towel and vinegar, to remove any trace of grease. Add thee egg whites and sugar, place the bowl over a pot of simmer water (not boiling). Whisking constantly, until temperature reaches 140 degrees F, if you don’t have a candy thermometer, until the sugar has completely dissolved and the egg whites are hot to touch.
With a whisk attachment on a electric mixer mixer, begin to whip on a medium speed until the mixture is thick, glossy, and the bowl is cool to touch. Switch over to paddle attachment and, while mixing on continuous medium speed, gradually add softened butter until combined, mix until it is silky smooth - this icing can curdle, if it does, keep mixing and it will come back to smooth. Add the vanilla essence and mix well.
Divide the Swiss Meringue Buttercream between three bowls, very carefully gradually add peach food colouring to each bowl until you have three peach icing ranging from light to dark - or your desired colour.
* I used wilton peach you only need the smallest amount possible so be careful. I dipped the tip of a wooden skewer into the icing one at a time and using a whisk, made sure that the colour was completely combined before adding more colouring.
You can keep the buttercream in airtight container in refrigerator for up to one week, be sure to leave it out at room temperature when needed and rewhipping in mixer for 5-10 minutes until smooth again. It can also freeze for up to 6-8 weeks.
Assembling your cake
Layer cakes are all about being patient and having all your ingredients ready to use. While your cakes are baking, I suggest making the both icings during that time - otherwise you can make them the day before to save on time. Layer your cakes from darkest to lightest - I ended up using three of the four cakes as I didn’t want it too high, but you are most welcome to use all four cakes you may need a little extra Swiss Meringue Buttercream though.
Using the Vanilla Buttercream Icing, lightly crumb coat the first cake and place in the fridge for 10min to cool. Add a thick layer of buttercream to the top of the cake, leaving the sides lightly iced, place in the fridge again for another 10min. Repeat until you have either three or four layers with a light crumb coat. Refrigerate your cake while you making the icing for the petals.
For the Petal Icing
Using a wilton 12 tip or any size circle tip. Fill three icing bags half full with the each of the different coloured swiss meringue butter cream - make sure you push all the icing to the bottom of the bag and squeeze a little icing out to remove any air bubbles.
Starting with the darkest colour pipe two dots above one another, then with the next colour another two dots, then with the lightest another too until you reach the top of the cake and you have a vertical line of dots. Using either a pallet knife or spoon, drag the icing from the middle of the dot to either the right or left until it blends into the crumb icing. Then repeat the dots about 2cm over from the last dot, drag the icing from the middle and repeat around the whole cake until complete. To ice the top, do the same thing, except you can only do one dot at a time - go around the whole cake, then work your way into the middle until you have a beautiful petal cake.
Tips
It helps to keep your hands cool while you are icing so that you don’t melt the butter - every other time you re-fil the icing bag run your hands under cold water… or if you are like me and have naturally cold hands you can skip this step.
Don’t over fill your bag with icing, it will become a lot harder to handle - half full is perfect.
When you fill your icing bag, pipe a little back into the bowl, this helps to push the icing down and get rid of any air bubbles.
Do take your time when icing this cake, it does take a while so try not to rush it. You will be enormously proud of this cake, it’s so pretty and will instantly impress all you’re lovely friends and family. I will also be teaching a petal class very soon, otherwise your more than welcome to book a private petal class with a group of lovely friends. x

follow made from scratch On